My Step by Step Picture Hanging Hacks for Hallways and Stairs
joy of nesting
Why is picture hanging so
intimidating? I admit it, even I find it daunting at times- – like when I’ve
been in my new home for almost fifteen months and I still haven’t finished my stair
case! Cue eye roll.
intimidating? I admit it, even I find it daunting at times- – like when I’ve
been in my new home for almost fifteen months and I still haven’t finished my stair
case! Cue eye roll.
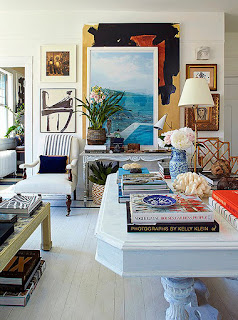
KleinField via Lonny
Hallways and stairs naturally
have lots of empty wall space and most people don’t know what to do with them. I’m
going to show you my own steps for hanging framed arrangements of prints,
family portraits, mirrors, and even shadow boxes.
have lots of empty wall space and most people don’t know what to do with them. I’m
going to show you my own steps for hanging framed arrangements of prints,
family portraits, mirrors, and even shadow boxes.
If
you don’t have family portraits, or a good selection of pictures to hang, or
just prefer a minimalist style, opt for two to three large framed coordinating prints
rather than small ones. Choose sets of prints that are obviously part of a matched
set, rather than mismatched for this. For a ten foot wide wall you can easily
do two to three coordinating framed prints or two mirrors sized around 28” wide
x 43” high.
This is just to give you a guideline.
Step 1
Gather
your tools and materials.
Always use a good quality tape measure
that’s over 20 feet long. It’s not just length you want to consider but also the
sturdiness of the tape. The shorter ones tend to be too flimsy and don’t handle
well. Get a pencil and hammer. Also, you may want to get a picture hanging kit from the hardware
store. I like the nice brass ones. You’ll most likely need spackle for filling in mistake holes and touch up paint.
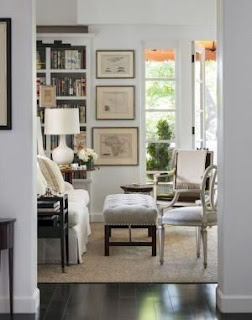
Susan Ferrier
Make sure to purchase some molly bolts for heavier pieces and be
aware you’ll need a hand drill for using molly bolts when hanging the larger
pieces.
aware you’ll need a hand drill for using molly bolts when hanging the larger
pieces.
Step 2
Gather
all your pictures,
portraits, mirrors, etc. – – whatever
you have that needs to be hung. In my previous home, in our wrap around
staircase I mixed family portraits, black and white photography, mirrors, a
shadow box of civil war pieces and a few pieces of artwork. They worked well
together because I had two matching mirrors and two coordinating black and
white framed stills that pulled everything together visually. I don’t use major
artwork in this type of a situation because art such as that needs to be more
of a focal point, not part of a grouping.
When
I’m designing or decorating I intentionally bring out way more items than I’ll
use. I like
to have a lot to choose from, whether I’m setting a table, choosing fabrics and
furniture for clients or accessorizing a room. By bringing out more choices, you’ll have a much better end result.
Remember this isn’t just math, it’s also part art!
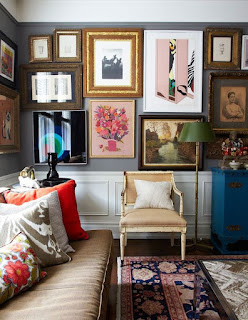
via Indulgy
Step 3
Get
down on the ground–
on a large, empty floor space start laying out your pieces. Start with the largest pieces first and
place them in the center of your arrangement. If they’re going up a
staircase you have the option of putting the big pieces parallel, side by side
or stair stepping them up the stairs.
By
placing the biggest pieces in the center, you’ve created a ‘kind of’
foundation, or visual anchor for the other smaller pieces. Now you can start from the
center of the arrangement and work your way around the outer perimeters. I
always like to work from left to right, high to low, just like you read a book.
Play with different combinations. The big secret to decorating with accessories
is there really is no secret. Even when I had my design stores, I relied on
trial and error. Don’t discount the beauty of art and accessories in your home,
or the feelings they evoke.
Once you’ve hit on an
arrangement you really love, or as I like to say ‘that double clicks’ for you, the
hard part begins: measuring.
arrangement you really love, or as I like to say ‘that double clicks’ for you, the
hard part begins: measuring.
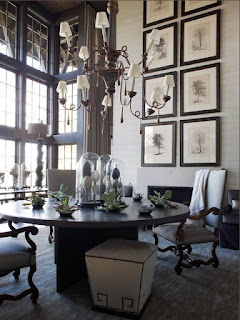
William McClure via The Pink Pagoda
Step 4
You are going to hang your
pieces one at a time, leaving the rest in position on the ground. But before you lift or move anything, make sure
you jot down the distance to its neighbor! And again, hang the biggest pieces first. You
will have to ‘eyeball’ hanging your first piece and you may have to do a few
trial and error holes, so prepare for that contingency. Determining the height
will be the hardest part.
When you place the first, big
pieces don’t place them too low or too high because the rest of the arrangement
depends on it. As a general rule I like to place them just a bit higher than
eye level. For instance, when you’re standing up close you should have to look
up a bit, craning your head about two natural feeling ‘notches’ upward. I hope
that makes sense. Bear with me here, like I said this is part art too, so
clarity isn’t always easy!
Once the biggest pieces are
perfectly placed, you can use them as a point of reference measurement. Things
start to get a little easier after this step. Yay!
perfectly placed, you can use them as a point of reference measurement. Things
start to get a little easier after this step. Yay!
If you have more than three pieces
or if you’re hanging things at heights above eye level it is a great job for
your handyman. Allow about 4 to 5 hours at $30 to $45 an hour. Don’t ask or
allow him or her to weigh in on how it looks. There will always be nay-sayers
and they will ruin your confidence and make you question your decisions. I say
this from experience. On more than one occasion a well-meaning client will let
a neighbor or friend or adult child attend our consultations without my consent
and it always ends up very unhappy for the client. I have never once had them
turn out good. I’ve discovered our best
friends seldom like us to make major changes to our home, our make up or hair!
So don’t ruin your joy by letting them weigh in. Trust your gut.
via The Visual Vamp Finding Studs
If you are lucky
enough to have a stud finder, great. I simply knock on the wall till I hear a
less hollow sound. It takes practice.
enough to have a stud finder, great. I simply knock on the wall till I hear a
less hollow sound. It takes practice.
Using Molly Bolts
For using
mollies you will likely need a hand drill. If your walls are plaster, purchase
a concrete bit. Start with your pencil mark, then using any old nail, nail a
small hole as a starter hole. Don’t hammer the nail so far in that you can’t
wiggle it back out again. Remove the nail and drill a hole using a drill bit a
little smaller than your molly.
Separate the molly from the screw
and hammer the molly into the prepared hole. Then screw the screw in till it’s
firmly in place, leaving enough screw exposed for your picture frame wire. For heavy mirrors, please use caution. Test
the weight of the piece by allowing only a small portion of the weight to be
supported by the molly at first. If the piece moves at all, you know it’s not
secure. I’ve hung many heavy mirrors in my day and have never had one fall but
to be safe please keep kids and pets away from them altogether. There is nothing
wrong with having boundaries in your home. Obviously I’m not referring to
toddlers here. You’ll need to use your best judgment in that case.
via J. Cathell
My Sweet Tape Measure Hack
I learned this trick from my fantastic
window treatment installer Mike Whitney whom I’ve used for over fifteen years.
window treatment installer Mike Whitney whom I’ve used for over fifteen years.
Take the tape measure in your
right hand and pull the tape out about 6 feet, with your left.
right hand and pull the tape out about 6 feet, with your left.
Keep the tape extended by
holding it in place with the pointer finger of your right hand.
holding it in place with the pointer finger of your right hand.
Now bend the tape and bring the
cartridge and tape close together.
cartridge and tape close together.
Holding securely, place the
tape firmly against the wall you’re measuring. Hold the ‘tail’ against the wall
with the big toe on your right foot.
tape firmly against the wall you’re measuring. Hold the ‘tail’ against the wall
with the big toe on your right foot.
Now, pinning the tape against
the wall, secure it with the side of your left hand while you pull the tape out
of the cartridge in an upward motion, up the wall. And that’s it! It’s super
easy.
the wall, secure it with the side of your left hand while you pull the tape out
of the cartridge in an upward motion, up the wall. And that’s it! It’s super
easy.
Hey friend! If getting started is hard for you, or if you’re stumped on your design
project, I created my one-on-one Designer Micro Sessions just for you! They’re an
easy and affordable way to solve your most pressing design problems. Click link
for deets!
project, I created my one-on-one Designer Micro Sessions just for you! They’re an
easy and affordable way to solve your most pressing design problems. Click link
for deets!
Live beautifully. Eat
beautifully,
beautifully,
Shiree’
